
Can you believe it, this project is not a dress? Not only is it *not* a dress, its not for me either! This beautiful fuchsia robe is for my wonderful Aunt Isabelle :)
My Aunt Isabelle is quite the lady. She's very generous and kind-hearted, and she has a big soft spot for animals (especially cats, she'll get a kick out of all the included photos of the kitties ;). When she mentioned a few weeks ago that she was looking for a cotton robe, I knew right away I wanted to make her one.
On that particular day, I was with my mom and Aunt Isabelle at Fabricville. Mom and dad live out of town, and when they come up, we usually hit the fabric store as mom is also a sewer :) One of the store manequins was sporting a white cotton robe with a sailboat theme on it. I overheard my Aunt asking one of the employees if the robe was for sale (it either wasn't or someone had asked to purchase it first). I also overheard my Aunt tell my mom that it was difficult to find a nice robe that was 100% cotton.
On our way to drop off my Aunt, I tried to discreetly ask some questions about what kind of robe she was looking for (length, if it was the print she liked, etc.). She was very surprised when I gave it to her, so I guess I wasn't too obvious ;). The most important thing to my Aunt Isabelle was finding a robe that was all cotton, as our Canadian summers can get mighty humid :p
Once we dropped off my aunt, mom and I headed straight back to Fabricville! We decided on some fuchsia cotton. I remember Aunt Isabelle saying in the past how much she liked that particular colour so we both thought it would be perfect!
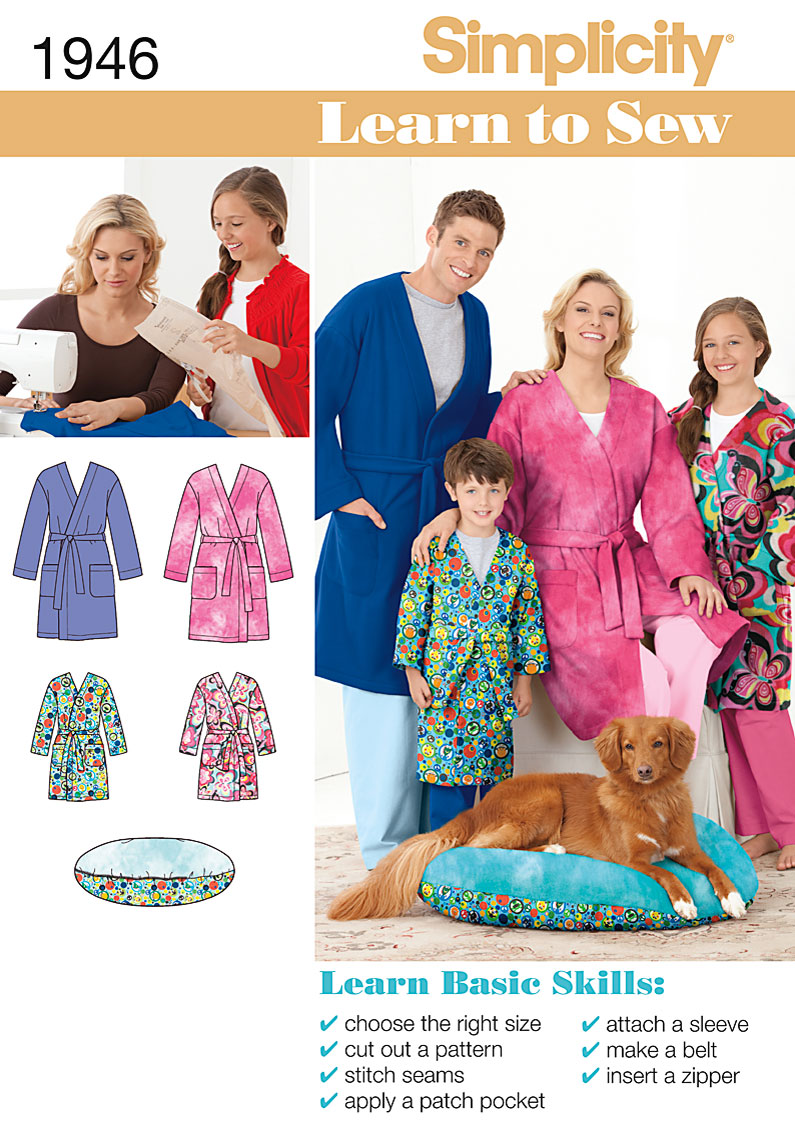
I had this Simplicity robe pattern in my stash, and figured it would work nicely :)
This was one of those "Learn to Sew" patterns by Simplicity. They really hold your hand in this one! It makes for a great pattern for a beginner. They're very encouraging, almost sickeningly so.
My crazy cat, Chewfoot hanging around while I prep the pattern pieces :)

I made some modifications to this pattern. When I laid out the pattern pieces, I realized I didn't purchase enough fabric, so I had to chop off a good 6" off the length of the robe! That was ok, since Aunt Isabelle said she'd like a knee length robe anyway.
I also decided to modify the sleeves to a more


Boris hanging out too :) I can't resist including photos of the kitties. They amuse me :)
I think its a bit unnecessary to give a thorough step-by-step detail of how I constructed this very simple robe, but I will mention a few things I did that may be helpful to any blog-readers :)

First of all, I didn't use a serger, but I wanted the seams to be strong and resist fraying (as this pink stuff frays like crazy!).
This photo to the right is at the shoulder. I cut a narrow strip of selvedge that I overlock stitched (with an overlock foot on my regular sewing machine) to that seam to help prevent stretching.

At the side seams, I stitched the seam, then trimmed the seam allowance a bit with pinking shears, and overlocked the edge.
I also treated the seams at the sleeves in the same way.
I used pinking shears a lot in this project, even on the belt before turning it right side out (I did not overlock any seam on the belt though).
For the hem, I pinked the raw edge (though probably not necessary) and did a regular hem.

The pattern instructs you to baste the pockets on before attaching to the robe (so they don't shift while sewing).
I opted to use my sewing buddy, "steam a seam lite 2" instead. I *love* the stuff! It's proven to be my most useful notion thus far!

So, at one point I was thinking of only including one pocket instead of both (I had already made both pockets. After asking my husband, Dan, his opinion though, I agreed it would look better with two.
I had attached one pocket and was searching all over the apartment for the other. After about 10 minutes, I looked under Boris (who had made himself comfortable on my sewing chair). I guess I had mindlessly tossed the other pocket there and he was laying on it! :)

I adjusted the placement of the pockets, since I had taken so much length off the robe. I really like how they turned out :)

The pattern doesn't instruct this, but I stitched a triangle to reinforce the top corners of both pockets.

Overall, I'm pretty happy with how this robe turned out. Knowing my Aunt Isabelle, I figured she would be very gracious about anything I'd make for her (just because it was from her niece :), but I still wanted her to really like it.
Aunt Isabelle was very pleased when I gave her her robe. It was very rewarding to me, to see her reaction :)
It was nice to sew for someone else for a change (something besides a receiving blanket, that is ;)
No comments:
Post a Comment